If you cannot reach an island in the Mirror Isles, inspect the mirror alignment and the position from which you are reflecting. The destination depends on that relationship, so a gap that cannot be crossed from the nearest shore may be reachable from another square. In later mixed areas, you may need to create a stone platform before reflecting the character onward.
This guide separates ordinary eastern-island diagnosis from specific examples in Mirrors and Stones Part 4. Those later examples include the Sailor, the Trader, and skipping stones; they should not be applied to an early Mirror Isles room without those elements. Match the visible layout before using any stage sequence.
Identify what makes the island unreachable
Start by naming the destination you need. An island can contain several reachable landing squares, and the nearest shore is not always the square that lets you continue. Inspect where you would stand after reflecting and whether that position gives access to the next useful action.
Then compare that destination with the current mirror relationship. Is the reflection pointing to water, to an obstructed square, or to the wrong piece of land? These are alignment problems. If the reflected square is useful but the Trader cannot reach the necessary starting square, the problem concerns access before the reflection.
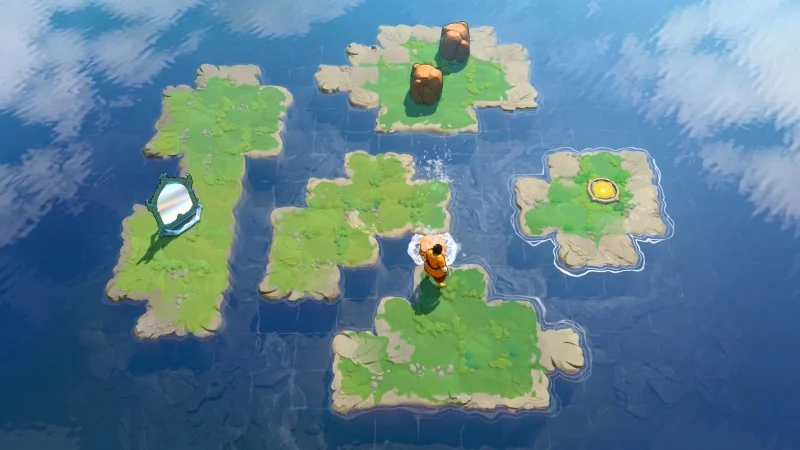
Keep those two cases separate. Moving the mirror can change the destination, while repositioning the Trader changes the subject being reflected. If you adjust both at once, you lose the clearest way to identify which part of the relationship was preventing the crossing.
Do not decide that an island requires a later automatic unlock solely because the first obvious reflection fails. The game has nonlinear exploration and navigation puzzles. Inspect the routes and useful positions currently available before concluding that the island is outside your present progress.
Check the starting square as carefully as the landing square
Walk around the land you can reach and inspect protruding tiles, docks, and narrow strips. A square that has little value as an ordinary walking route can give you a useful position relative to the mirror.
For each candidate starting position, compare the reflected destination. The goal is to find a relationship that puts the Trader onto useful land, not merely across part of the gap. If the mirror itself needs moving, check whether the Trader can still approach it after that adjustment.
An apparently successful crossing can fail as a route if it removes your ability to change the mirror again. Before reflecting, identify what must happen immediately afterward. You may need to move another object, return to the original island, or reflect from an intermediate position.
Use undo when a landing creates no useful next action. Return to the earlier arrangement and inspect what the destination needed to provide. This gives you a more precise correction than trying another crossing simply because it reaches a different square.
Check whether an object must cross first
Mirrors transfer objects as well as characters. If the Trader cannot make useful progress after reflecting, inspect the rocks and other movable objects in the room. One may need to reach the destination before the character does.
The useful question is what the far side must contain for the next action. A reflected object can establish a position or become part of a route in a mixed puzzle. Do not automatically clear it out of the way just because it occupies useful walking space on the starting island.
Also inspect where the object can be manipulated after it arrives. A rock placed on a new island is only useful if a character can interact with it from the side required by the next step. The character crossing and the object transfer are related conditions, and their order can matter.
Recognize a mixed Mirrors and Stones crossing
Later puzzles combine the Trader's mirrors with the Sailor's skipping stones. In these rooms, a reflected rock can become part of a water path or create an intermediate platform. The island that looks unreachable by a single reflection may require two transfers with a newly established landing position between them.
Before using a mixed-area sequence, identify both characters and the stones described. If your room only contains the Trader and a mirror, the steps involving a Sailor launch or a stone sent across water do not match your puzzle.
For a room that does match, keep the two roles distinct. The Sailor launches and routes the skipping stones; the mirror supplies transfers; the Trader uses the resulting land or platform to continue. The goal is to arrange their interactions, not simply to push the mirror closer to the exit.
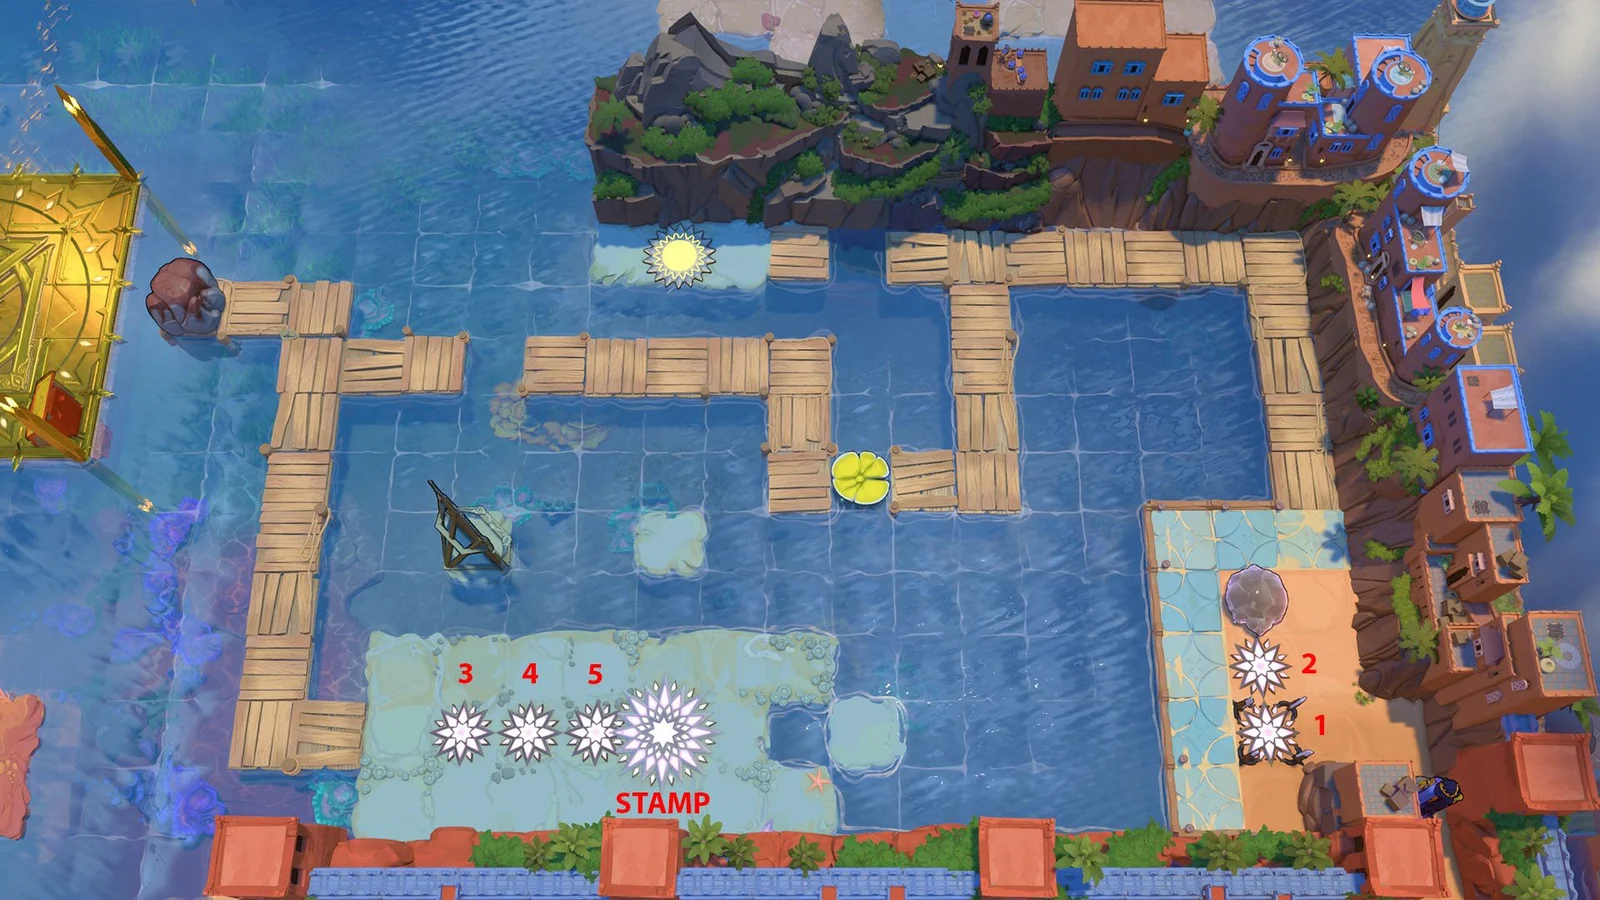
Part 4 Stage 2: reach the northern strip
This example belongs to Mirrors and Stones Part 4. It uses a skipping stone that must move to a second island before a path becomes available to the northern strip.
- Place the mirror three tiles below the skipping stone.
- Reflect the stone to gain room to maneuver it, then move it south two tiles.
- Bring the mirror down into line with the stone before launching the stone across.
- When the launched stone clears the northern strip, reflect it without hitting the lily pad.
- Reflect it again so it reaches land on the second island.
- Move the stone down and left, then send it north on the other side of the lily pad to create the path.
- Reflect the Sailor onto the northern strip and reach the exit.
The key condition is the stone's route around the pad. A direct-looking launch can interfere with the pad instead of creating the needed path. If the stone ends in the wrong place, reverse to the alignment stage and compare its route with the northern strip before working on the character's final reflection.
These directions depend on the described starting layout. They are not a universal instruction to place every mirror three tiles below a stone. Use the area and stage identification to prevent a specific adjustment from becoming an assumed rule.
Part 4 Stage 4: use the platform near the exit
In the fourth stage, reaching the exit platform requires arranging the stones into more than one useful position. The Trader later reflects from the dock and then from the stone platform.
- Send the third rock up to the platform and reflect it to establish the first bridge.
- Send the first rock west so it lands beside the exit.
- Reflect that rock north, beside the dock, to create a small platform.
- Send the second stone onto the first northern platform, then use it to make the second bridge for the Trader.
- Move the Trader to the far end of the dock and reflect him north.
- Move him onto the stone platform and position the mirror for the final transfer to the exit platform.
The important correction to a failed direct crossing is the intermediate platform. Reaching the dock's end is not the final starting position. The rock platform provides another place from which the Trader can be reflected onto the exit land.
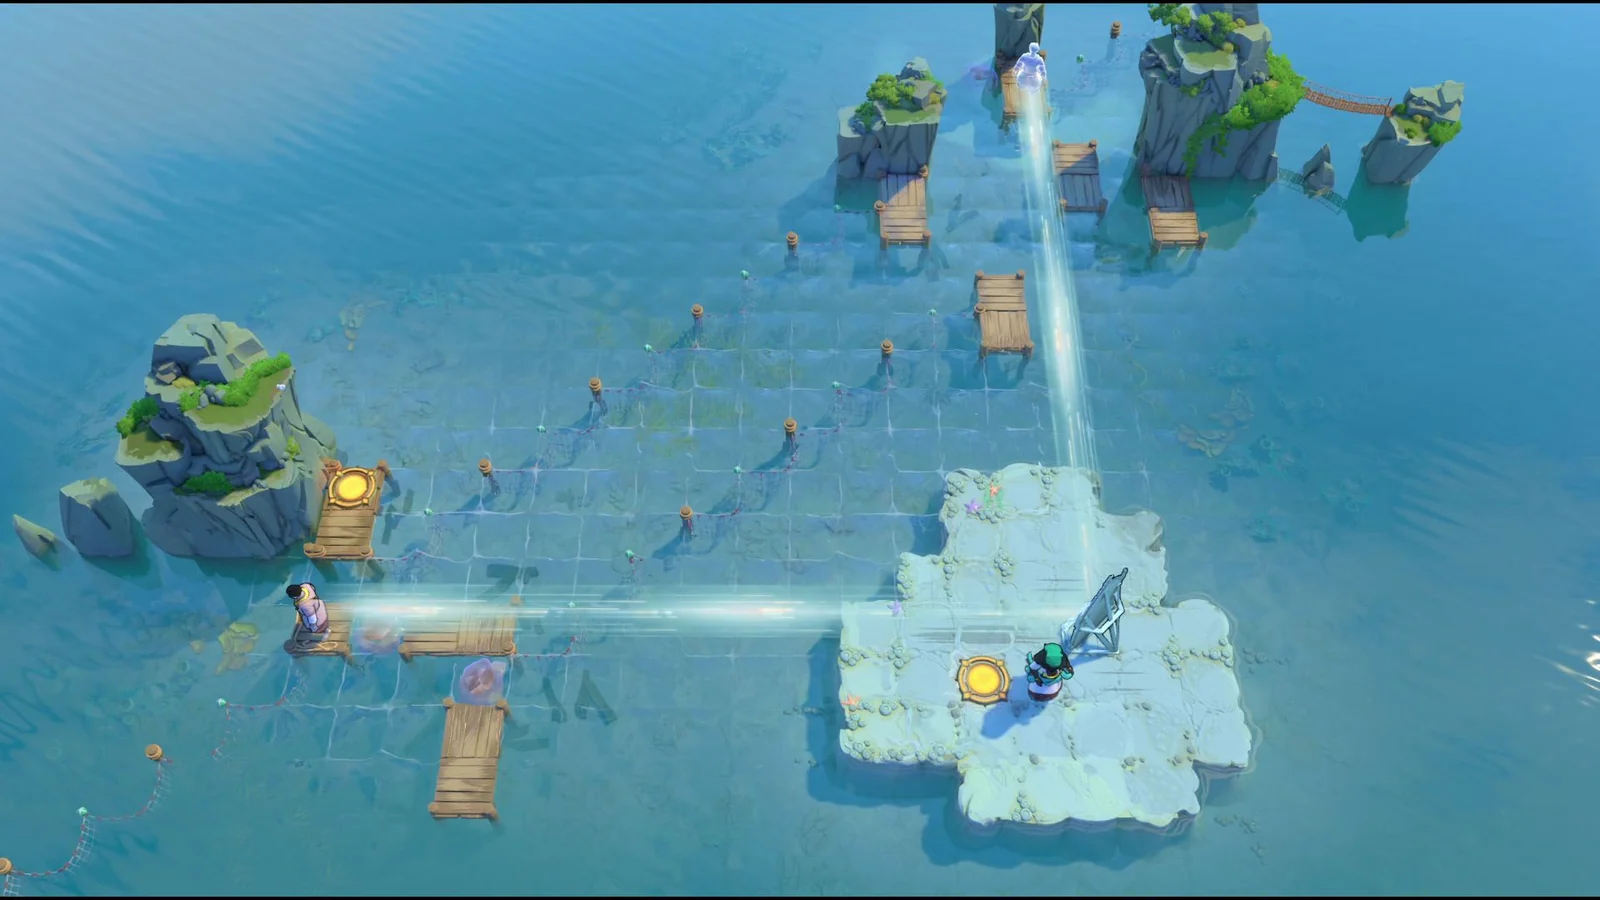
If the final island remains unreachable, inspect that intermediate position before shifting the mirror repeatedly. Verify that the rock platform has been established beside the dock and that the Trader can stand on it. The mirror's final alignment assumes that starting position.
Part 4 Stage 5: connect the docks through useful landing positions
The fifth stage continues the idea of changing where the Trader can stand before reflecting. Move him west and reflect him onto the northwest island. Send the first stone up to him, then move the mirror so the stone creates a bridge.
Move the Trader to the stone's former position and reflect him again. Reflecting the Sailor to the left lets you push the mirror out. The Trader then reaches the end of the dock and reflects to the northeast.
From the southeast corner of that island, reflect the Trader onto the third dock. Halfway along the third dock, reflect him onto the second island and leave him there. Send a stone toward him to make a platform he can stand on, then use that position for the final reflection to the exit.
This sequence illustrates why judging an island from one reflection position can be misleading. The route establishes several intermediate positions, and each new position changes the useful transfer available next. If your attempt stops partway through, identify the missing platform or character position instead of restarting the final reflection from whichever square is nearest.
Part 4 Stamp Stage: create a landing platform rather than another bridge
The stamp stage initially uses bridges. Move the Trader to the easternmost part of the island and line the mirror up with him. Send the uppermost stone north and reflect it after it clears the island to create a bridge.
Move the Trader as far south as possible and repeat the same kind of bridge setup. The final crossing changes the objective: the needed position is a platform in the water, rather than another continuous bridge.
Place the mirror south, aligned with the southernmost strip on the west. Bring the stone into line and send it north, stopping as far west as it can reach on dry land. Reflect it once more to establish the platform in the water.
Position the Trader so he can reflect onto that platform. Move the mirror north three tiles, then reflect him onto the final land and the exit. If you keep trying to extend a bridge at this point, reconsider the role of the isolated platform: it provides the starting position for the last transfer.
Choose the next correction from the failed condition
After a missed island crossing, inspect the first condition that differed from the intended arrangement. A reflection into water means the destination relationship was wrong. A rock on the wrong island points to an object transfer. A Trader unable to reach the platform points to an earlier path or positioning step.
Recover that condition with undo before repeating the final action. If the sequence belongs to another stage, stop applying it and identify your own layout. Matching the mirror, land shapes, characters, and stone positions is necessary for reliable exact directions; sharing the same area name is not enough.