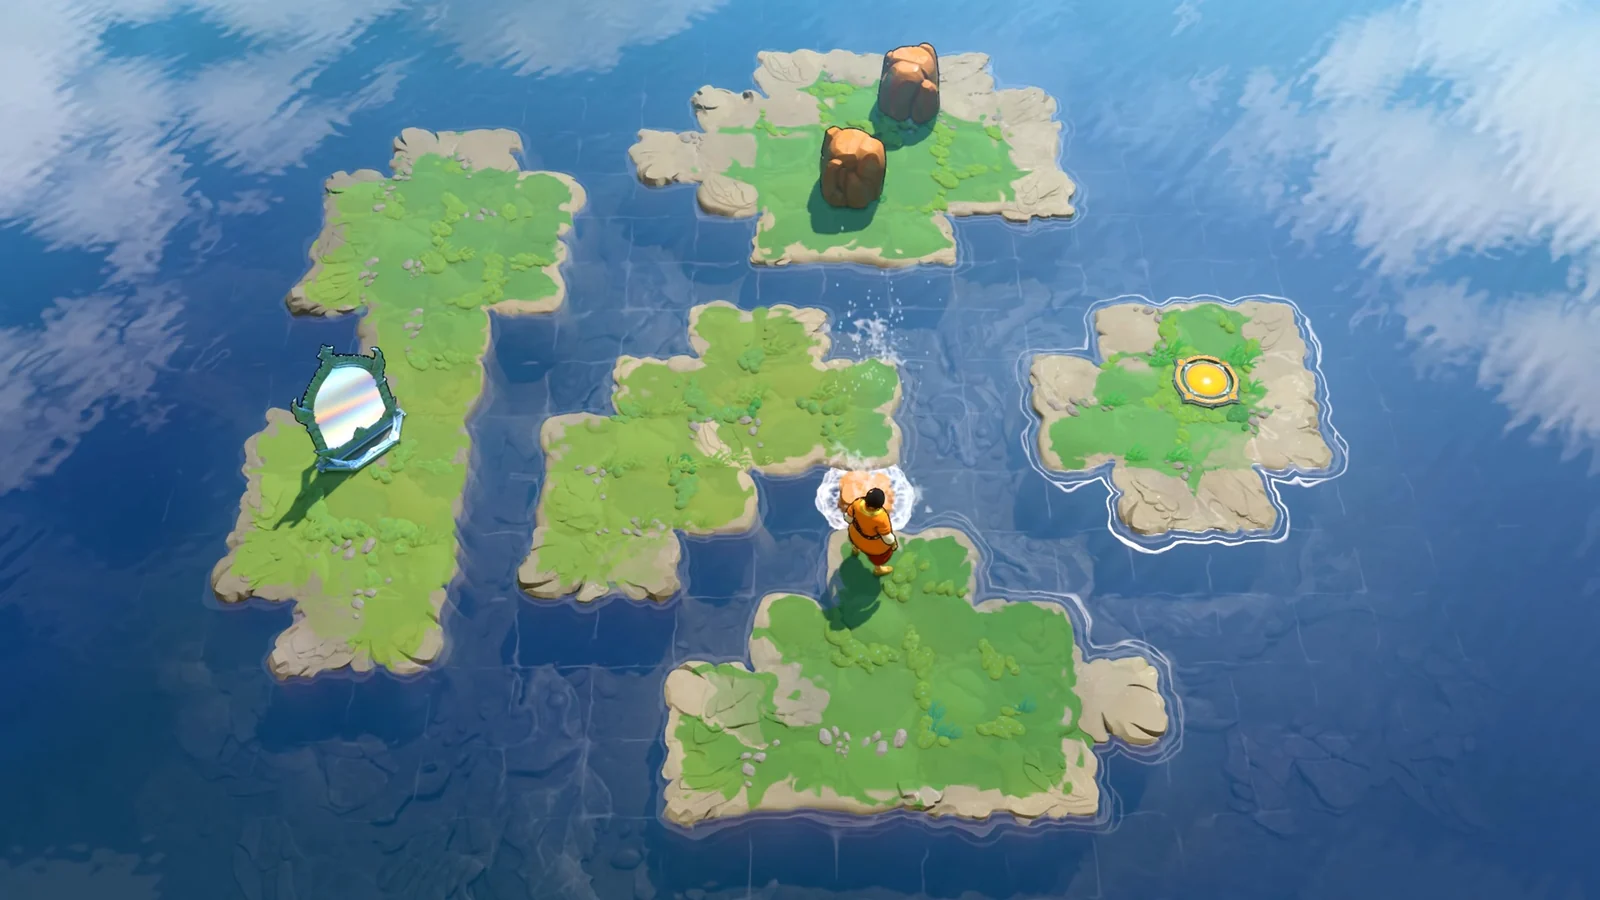
The Order of the Sinking Star Mirror Isles mirror swap moves a character or object to its reflected position. Your position relative to the mirror determines the destination. Moving the mirror or changing your distance from it changes the places you can reach, so an island that is too far away from one arrangement may be reachable from another.
Plan the landing before triggering the reflection. Inspect the source tile, the mirror, and the destination together. A successful swap only helps if the resulting position supports the next move. The steps below explain that planning and include a release-era Mirrors and Stones example; they are not a universal input sequence for every Mirror Isles room.
Read the destination on the grid
Mirror movement is a relationship between positions. Start with the character or object you want to move, then inspect the mirror that provides the reflection. Count grid spaces instead of judging distance from the angled camera. A landing that looks close to a platform may still be the wrong tile.
Changing your distance from a mirror can extend the reflected destination. Moving the mirror changes the relationship as well. Consider which adjustment is available in the current room: you may have room to move the Trader but no access to another side of the mirror, or you may be able to push the mirror while the Trader's usable floor remains limited.
Before acting, identify the next useful standing tile rather than simply the island you want. A narrow dock, a gap in a bridge, and an exit platform can demand different positions within the same general area. A reflection that reaches the wrong part of an island may leave you unable to reach the side needed for another push.
Move the mirror while preserving access
The mirror's next position matters, but so does your ability to move it afterward. A push toward the edge can produce a useful immediate reflection and still remove the access required for the rest of the room.
Inspect the sides of the mirror before moving it. Determine which side you will need for the next adjustment and whether you can still reach that side after the push. If a reflection is supposed to put you behind the mirror, verify that the destination actually provides that access rather than assuming the crossing solves the movement problem.
Separate two goals when planning: positioning the mirror for the desired reflection, and positioning the Trader to continue working with the mirror. You can satisfy the first while failing the second. This is why a promising crossing sometimes ends with the player stranded beside a device that cannot be pushed in the necessary direction.
Undo when a move removes access instead of adding further adjustments from a constrained state. Return to the last arrangement that permits both the reflection and the following mirror movement. Then change the order of operations or use another reflected position to reach the required side.
Use objects to prepare a usable landing
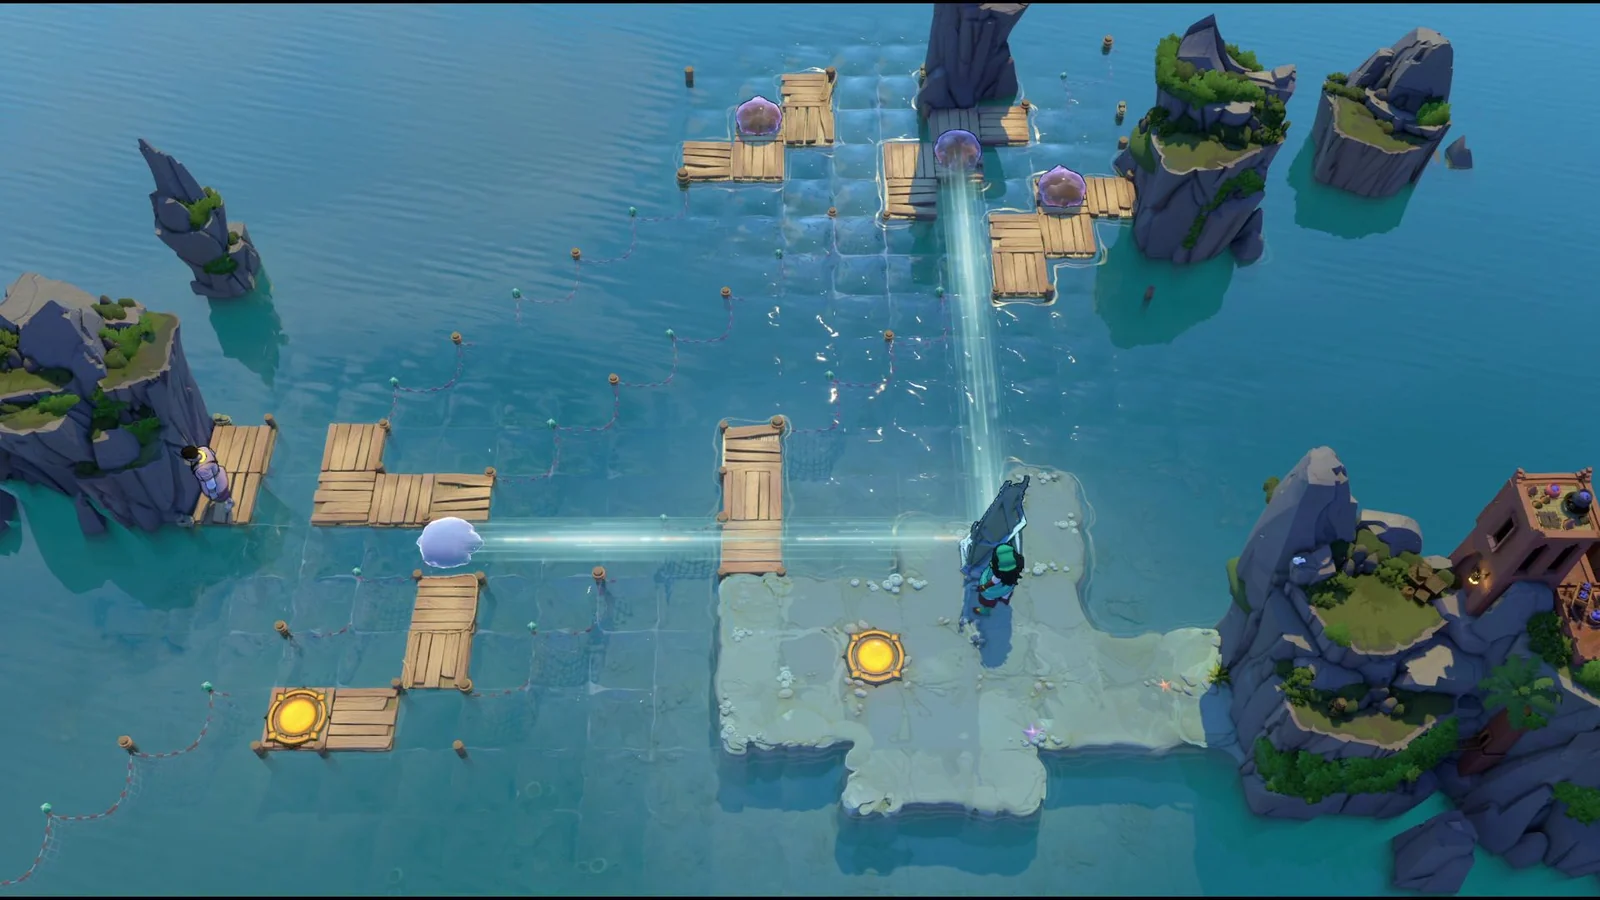
The Mirror Isles include movable rocks and crystals as well as mirrors. The reflection can reposition these objects, so the route may involve preparing an object before moving the Trader.
Determine what role the object serves. It might create a bridge connection, provide an intermediate standing place, or occupy a position needed for another interaction. Plan that result first, then decide where the Trader must stand to continue. Moving the character immediately toward the exit can be premature if the object setup is still incomplete.
For a bridge problem, inspect the missing square and the mirror position that can send the relevant object there. Working backward from the required destination can narrow the possible source positions. It is more useful than pushing the mirror in every available direction without a target.
Do not assume every rock or crystal behaves identically in water or that any submerged position is useful. The object's role depends on the room. Use its actual movement and reflection result to check your plan, then undo if the test removes access. A demonstrated bridge technique is a room-specific operation, not permission to discard every movable object into the sea.
Distinguish a swap from character selection
A reflection changes the board. Selecting another character changes which existing character receives the next input. In combined rooms you may need both operations, but they solve different problems.
For example, a room containing the Trader and the Sailor may require the Sailor to send a stone across water, the mirror to move it, and the Trader to push it again from the other side. Switching to the Trader does not itself send the stone to that side. The reflection must first create the position where the Trader can act.
Likewise, in clone rooms, do not assume that selecting another copy is the same as reflecting the first one. The demo's pale orange star puzzle permits selection between existing copies, while mirror operations alter their spatial relationship. Determine which action your plan requires before triggering it.
This distinction prevents an unnecessary chain of actions. If you only need another available character to move, select that character. If the character is in the wrong place, inspect the reflection or another supported movement mechanic that can reposition it.
Convert available space into the direction you need
Some mirror puzzles use geometry in a less obvious way than a straight crossing. The demo's pale orange star puzzle provides a clear example: a right-angled mirror turns horizontal space into vertical space and vertical space into horizontal space. The useful objective is changing the separation between two Traders.
If you are in that matching layout, inspect why the room provides a long horizontal span. Compare the distance you can create along that span with the spacing needed after reflection. A crystal and water arrangement contributes to the positions from which the reflection can be performed.
This is a geometric hint for the demo example, not a release-wide rule for all mirror orientations. On another board, inspect the reflected destination instead of applying the same direction conversion automatically. A mirror's appearance, placement, and available source tiles determine what relationship you can use.
Even when the general relationship is clear, do not neglect the landing. Increasing distance can place a character beyond the usable floor. Work from the destination you require back to a source arrangement that both reaches it and leaves the next action possible.
Learn the handoff in Mirrors and Stones Part 4
Mirrors and Stones combines the Trader's reflections with the Sailor's stone-skipping system. Its fourth area's Stage 1 demonstrates why the timing of a reflection can matter alongside mirror placement. Use this example only when your board matches that stage.
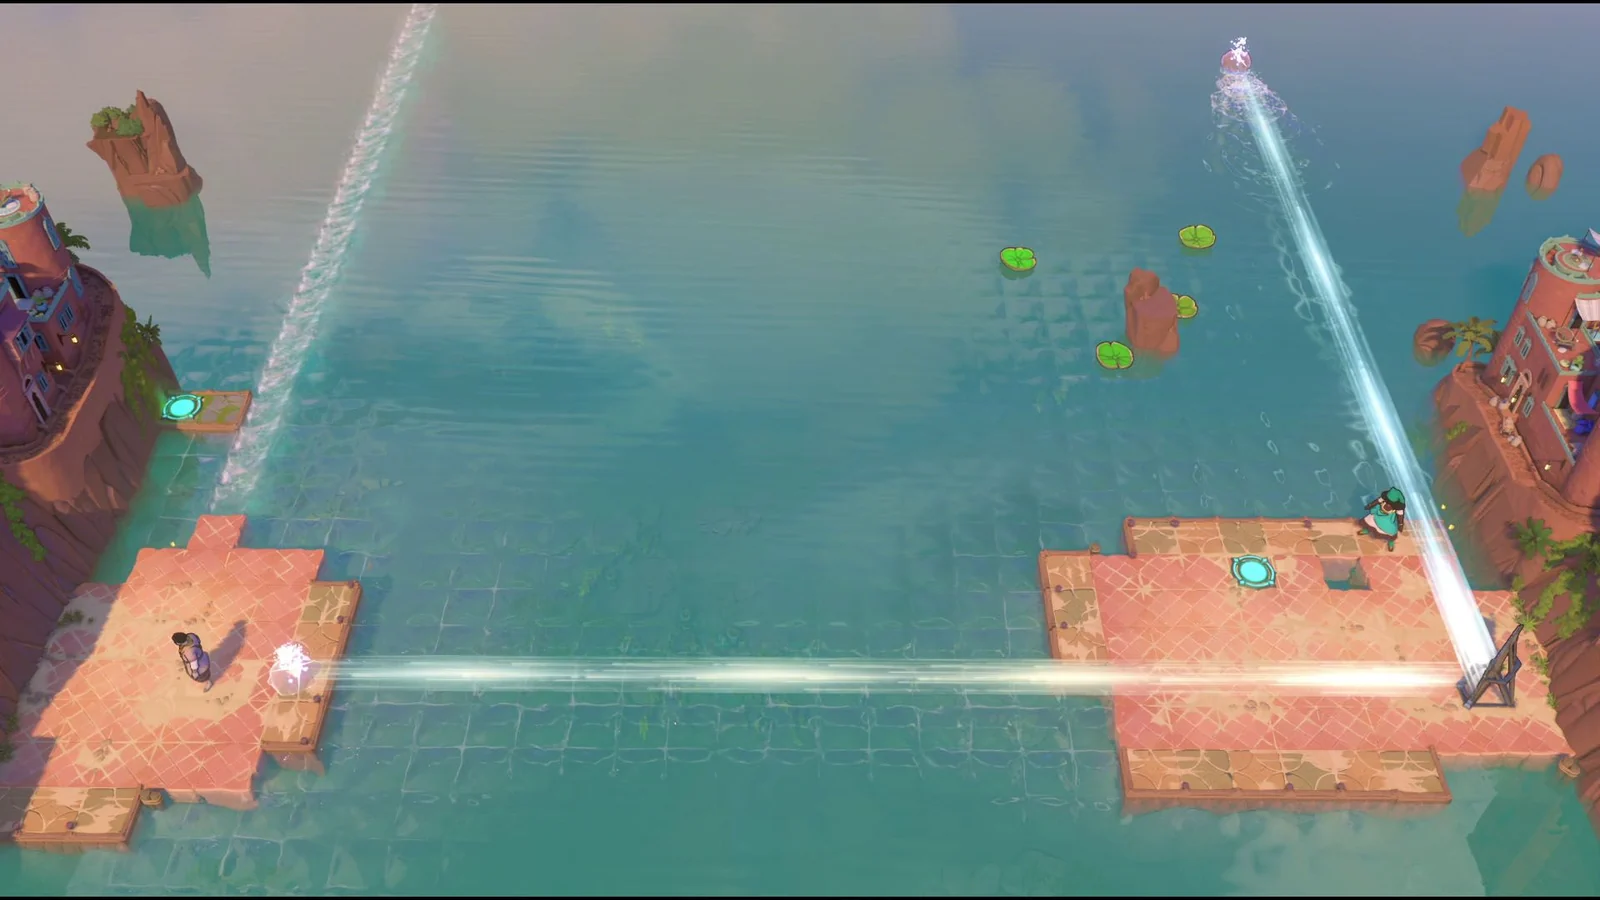
The opening has the mirror move right twice to align with the skipping stone. The Sailor launches the stone; after it bumps the lily pad, reflect it so the Trader can send it back. The stone's arrival gives the Trader a new action. Merely aligning the mirror does not complete that handoff.
The next arrangement moves the mirror left twice. The Sailor sends the stone west, then the reflection occurs after it clears the platform. Another reflection permits the Trader to return it. Here the action depends on the stone being in motion at the appropriate part of the route.
Later in the same stage, moving the mirror to the west edge supports another sequence: launch north, reflect promptly, and reflect back after the stone passes the first lily pad so it affects the second instead. A final stone movement toward the rock protruding from water shifts the remaining lily pad into a useful route.
The broader lesson is to inspect the stone's interaction before reflecting it. A swap performed too soon or too late can change which part of the water layout the stone affects. This is a specific example of a mixed mechanic, not an instruction to use timed reflections in every island puzzle.
Choose the right intermediate platform
Another lesson from Mirrors and Stones Part 4 is that a full bridge is not always the necessary result. In the stamp stage, earlier steps create bridges, but the final section instead uses an intermediate platform in the water.
The relevant sequence aligns the mirror with the southern strip on the west, positions the stone for a northward launch, and lets it reach dry land toward the west. Reflecting the stone again creates the intermediate platform. The Trader then reflects onto that platform; moving the mirror upward by three tiles provides the final reflection onto the exit landmass.
Use the stage's board to verify that arrangement before following its sequence. The principle to carry to other puzzles is to identify the minimum usable standing position. If a reflection can complete the remaining distance, you may not need a continuous walking path all the way to the exit.
This also changes what counts as a successful object placement. A rock that does not complete a bridge can still be useful if it supports the required intermediate reflection. Conversely, a long bridge can consume an object that the next reflection needs elsewhere. Judge the placement against the next action, not against how much floor it appears to add.
Diagnose a reflection that does not advance the route
Check the source tile first. If the destination is consistently wrong, inspect the character or object's distance from the mirror. Then inspect whether the mirror is aligned for the intended target. Change one relationship at a time so the result tells you which part of the geometry was mistaken.
If the destination is correct but you cannot continue, inspect the landing's access. You may need a different part of the island, an object prepared before the swap, or another character positioned to receive the handoff. Undo to preserve the setup while you revise that condition.
In a moving-stone combination, inspect the timing separately. Correct geometry does not guarantee the stone passes the intended lily pad before reflection. Slow time when the room calls for a precise event, then compare the observed interaction with the one your plan needs.
Finish each reflection by checking the next action. Can the Trader move the mirror again? Can the other character reach the object? Is the exit actually accessible from the landing? That final inspection turns a plausible swap into a useful step in the complete room sequence.